Managing Groups
Choose Repository > Recipients and open the Groups list. The following window is displayed:
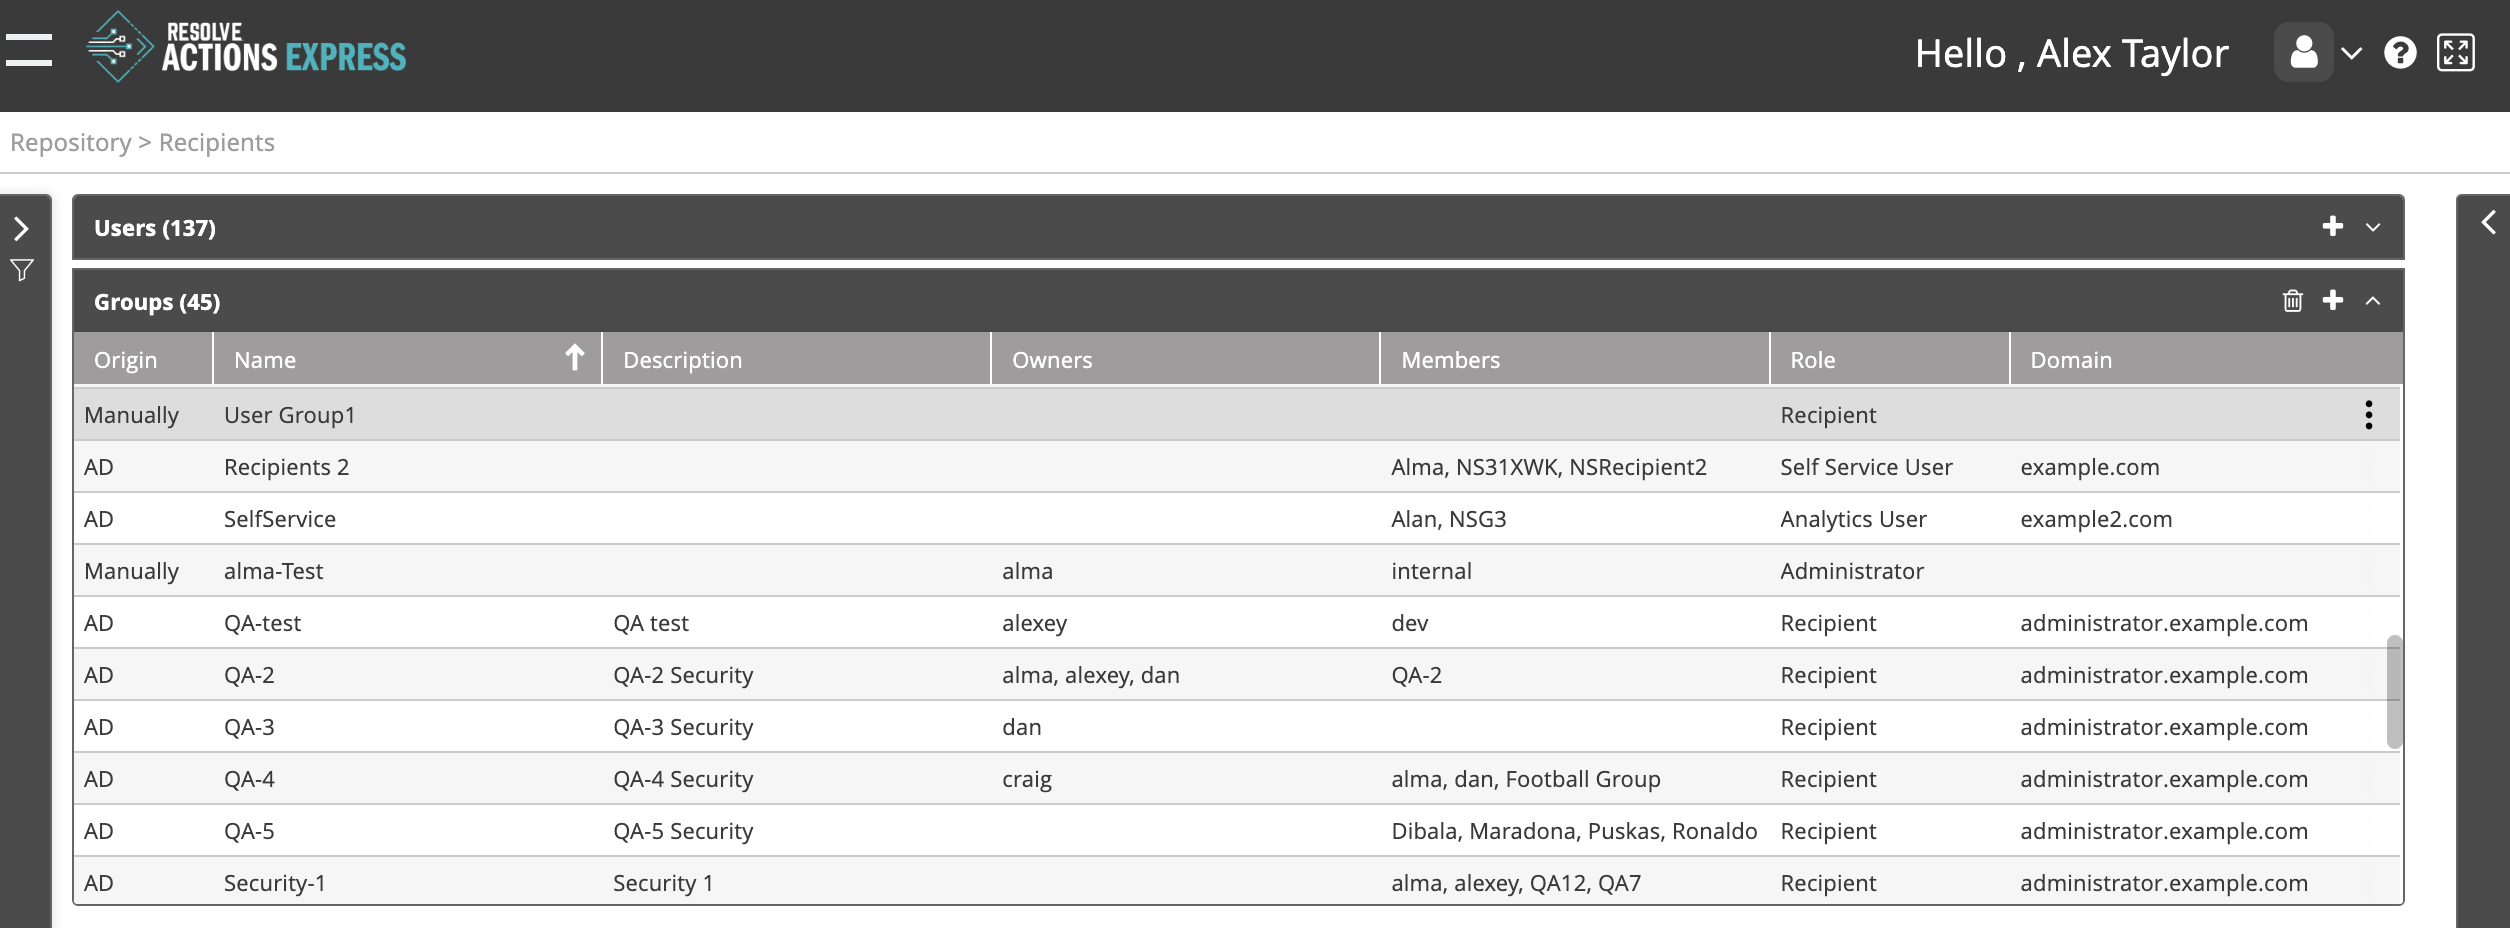
The Group list provides the following information:
| Column | Description |
|---|---|
| Origin | Imported manually or from Active Directory |
| Name | Name of the group |
| Description | Group description |
| Owners | The group may have several owners shown in a comma separated list |
| Members | Group members |
| Role | The role assigned to the group (meaning to all of its users) |
| Domain | The Active Directory domain (if applicable) |
Adding Groups
To add a new group:
- From the top right corner of the incident list, click the plus icon.
The users properties screen appears. - Enter the group name and description.
- Set the group owner/s. note
Group owners are the only users other than the administrators who are allowed to edit or delete the group.
- Set the group members. note
A group member may be a user or another group.
- Under Type, select User to add a user to the group or Group to add a sub-group to the group.
- Under Name, select the user or group to be added.
- Use the plus icon to add a new user or group.
- For further details about adding a new user, see Managing Users.
- The imported/manual field will be set from the user or group selected.
- To remove any member - user or group - from the group, select it from the list and click the X button.
- Click Save.