Create and Configure an MCP Server
This guide walks through creating a new MCP server, selecting skills, configuring authentication, and calling your endpoint — all from a single screen.
You'll need access to Actions Pro with at least one published runbook or workflow, and permission to manage MCP servers in your organization. See the MCP Server Builder Overview for key concepts.
Step 1: Navigate to Dynamic MCPs
- In the main menu, navigate to MCP Servers.
- Click All Servers in the navigation menu.
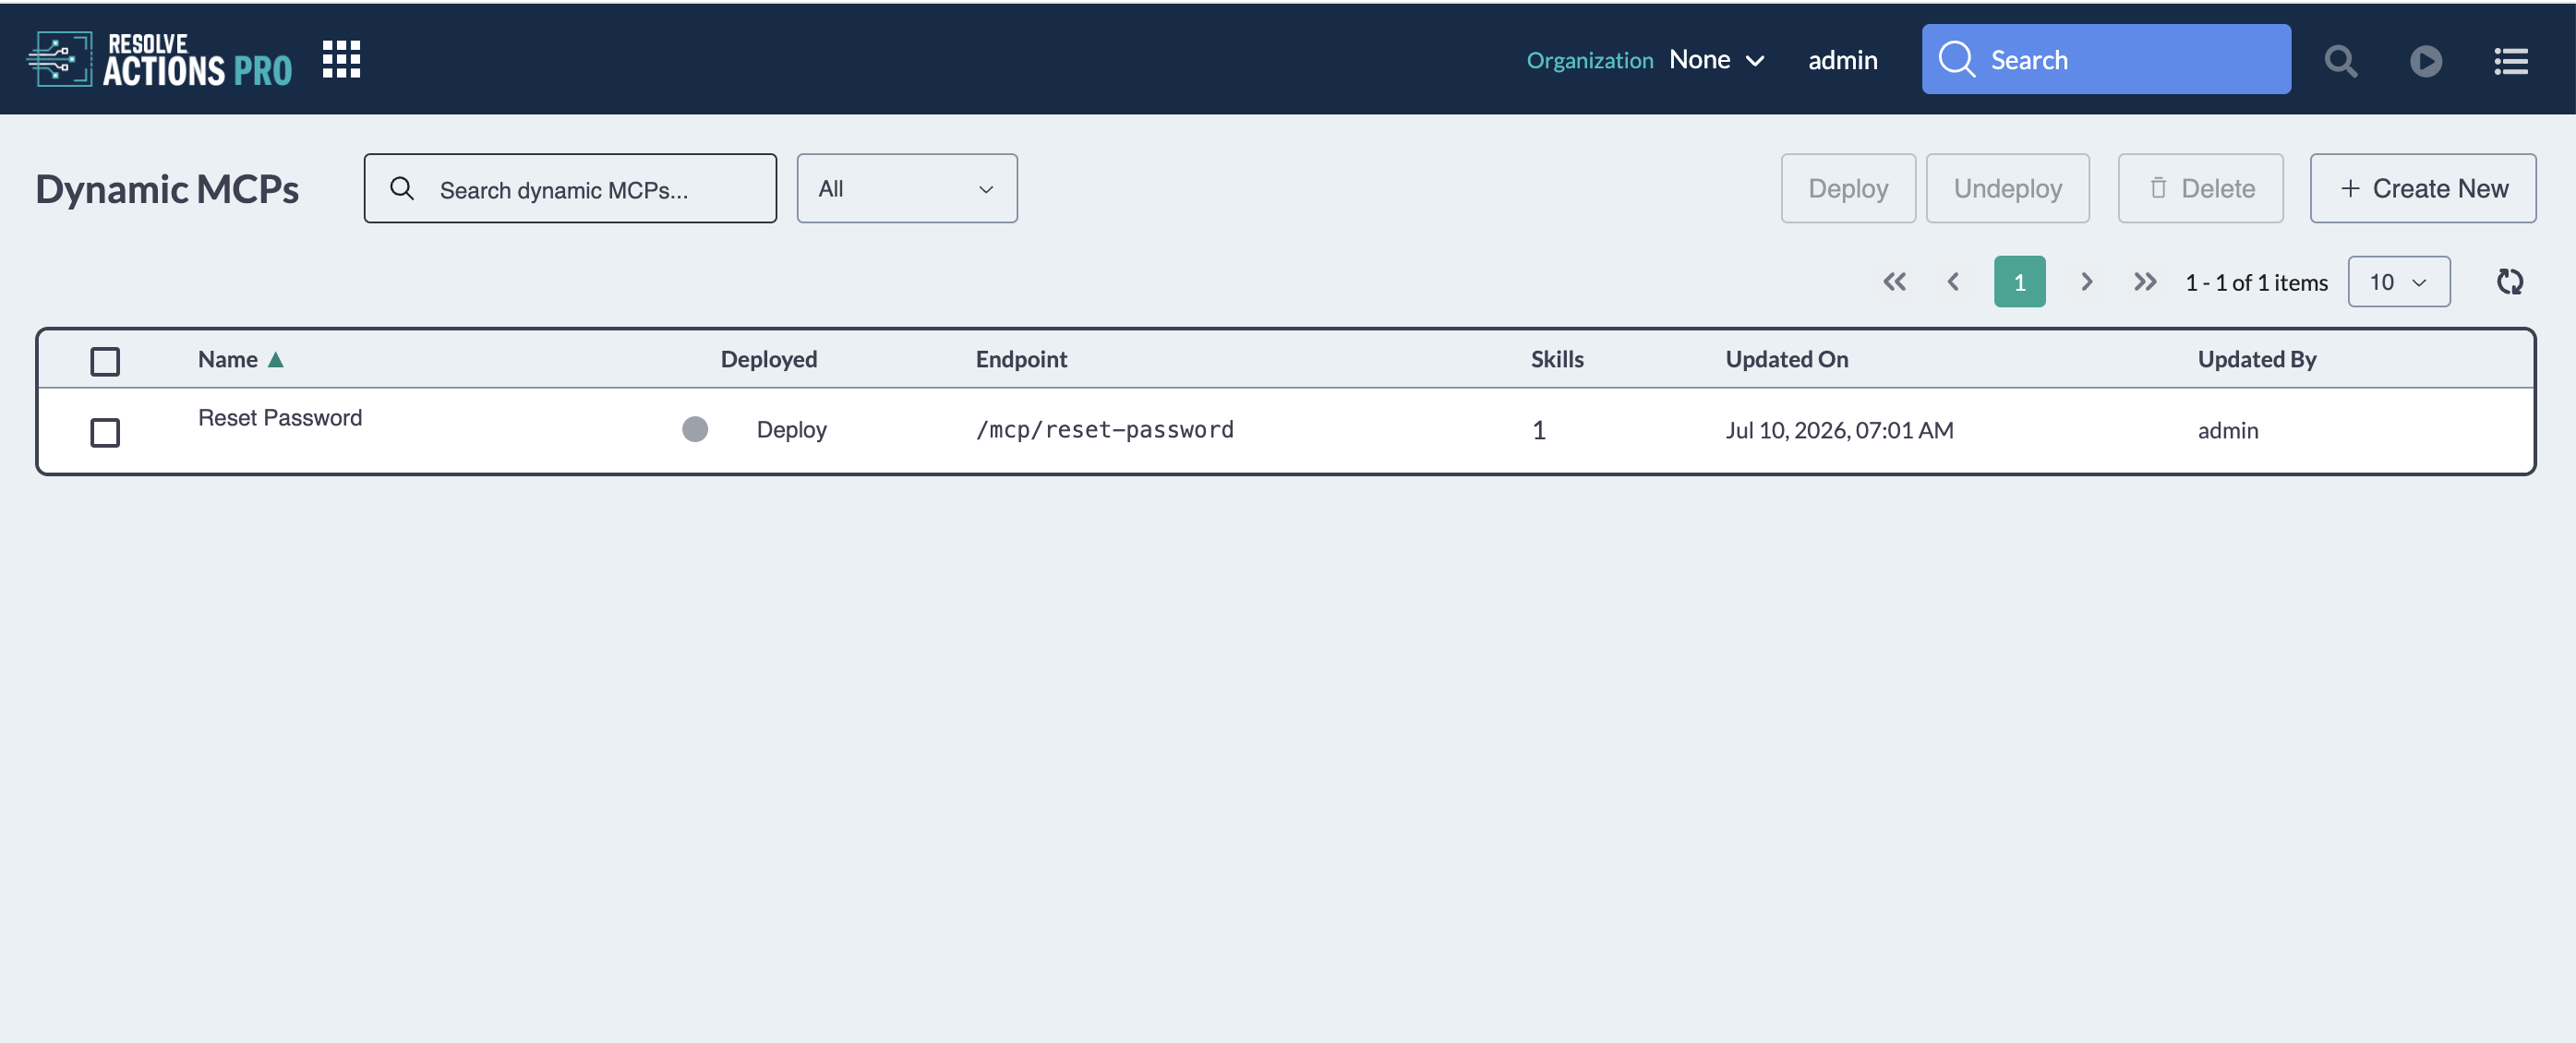
- You'll see a list of existing Dynamic MCPs, each showing its Name, Deploy status, endpoint, number of skills, date Updated On, and account Updated By.. From here you can click an existing MCP to modify it, or create a new one.
The values in the Name and Deployed columns are clickable. Click the name to edit the MCP, or click its deployed status to set it to Deployed or Not Deployed.
Step 2: Create a New Dynamic MCP
Click + Create New in the top right corner.
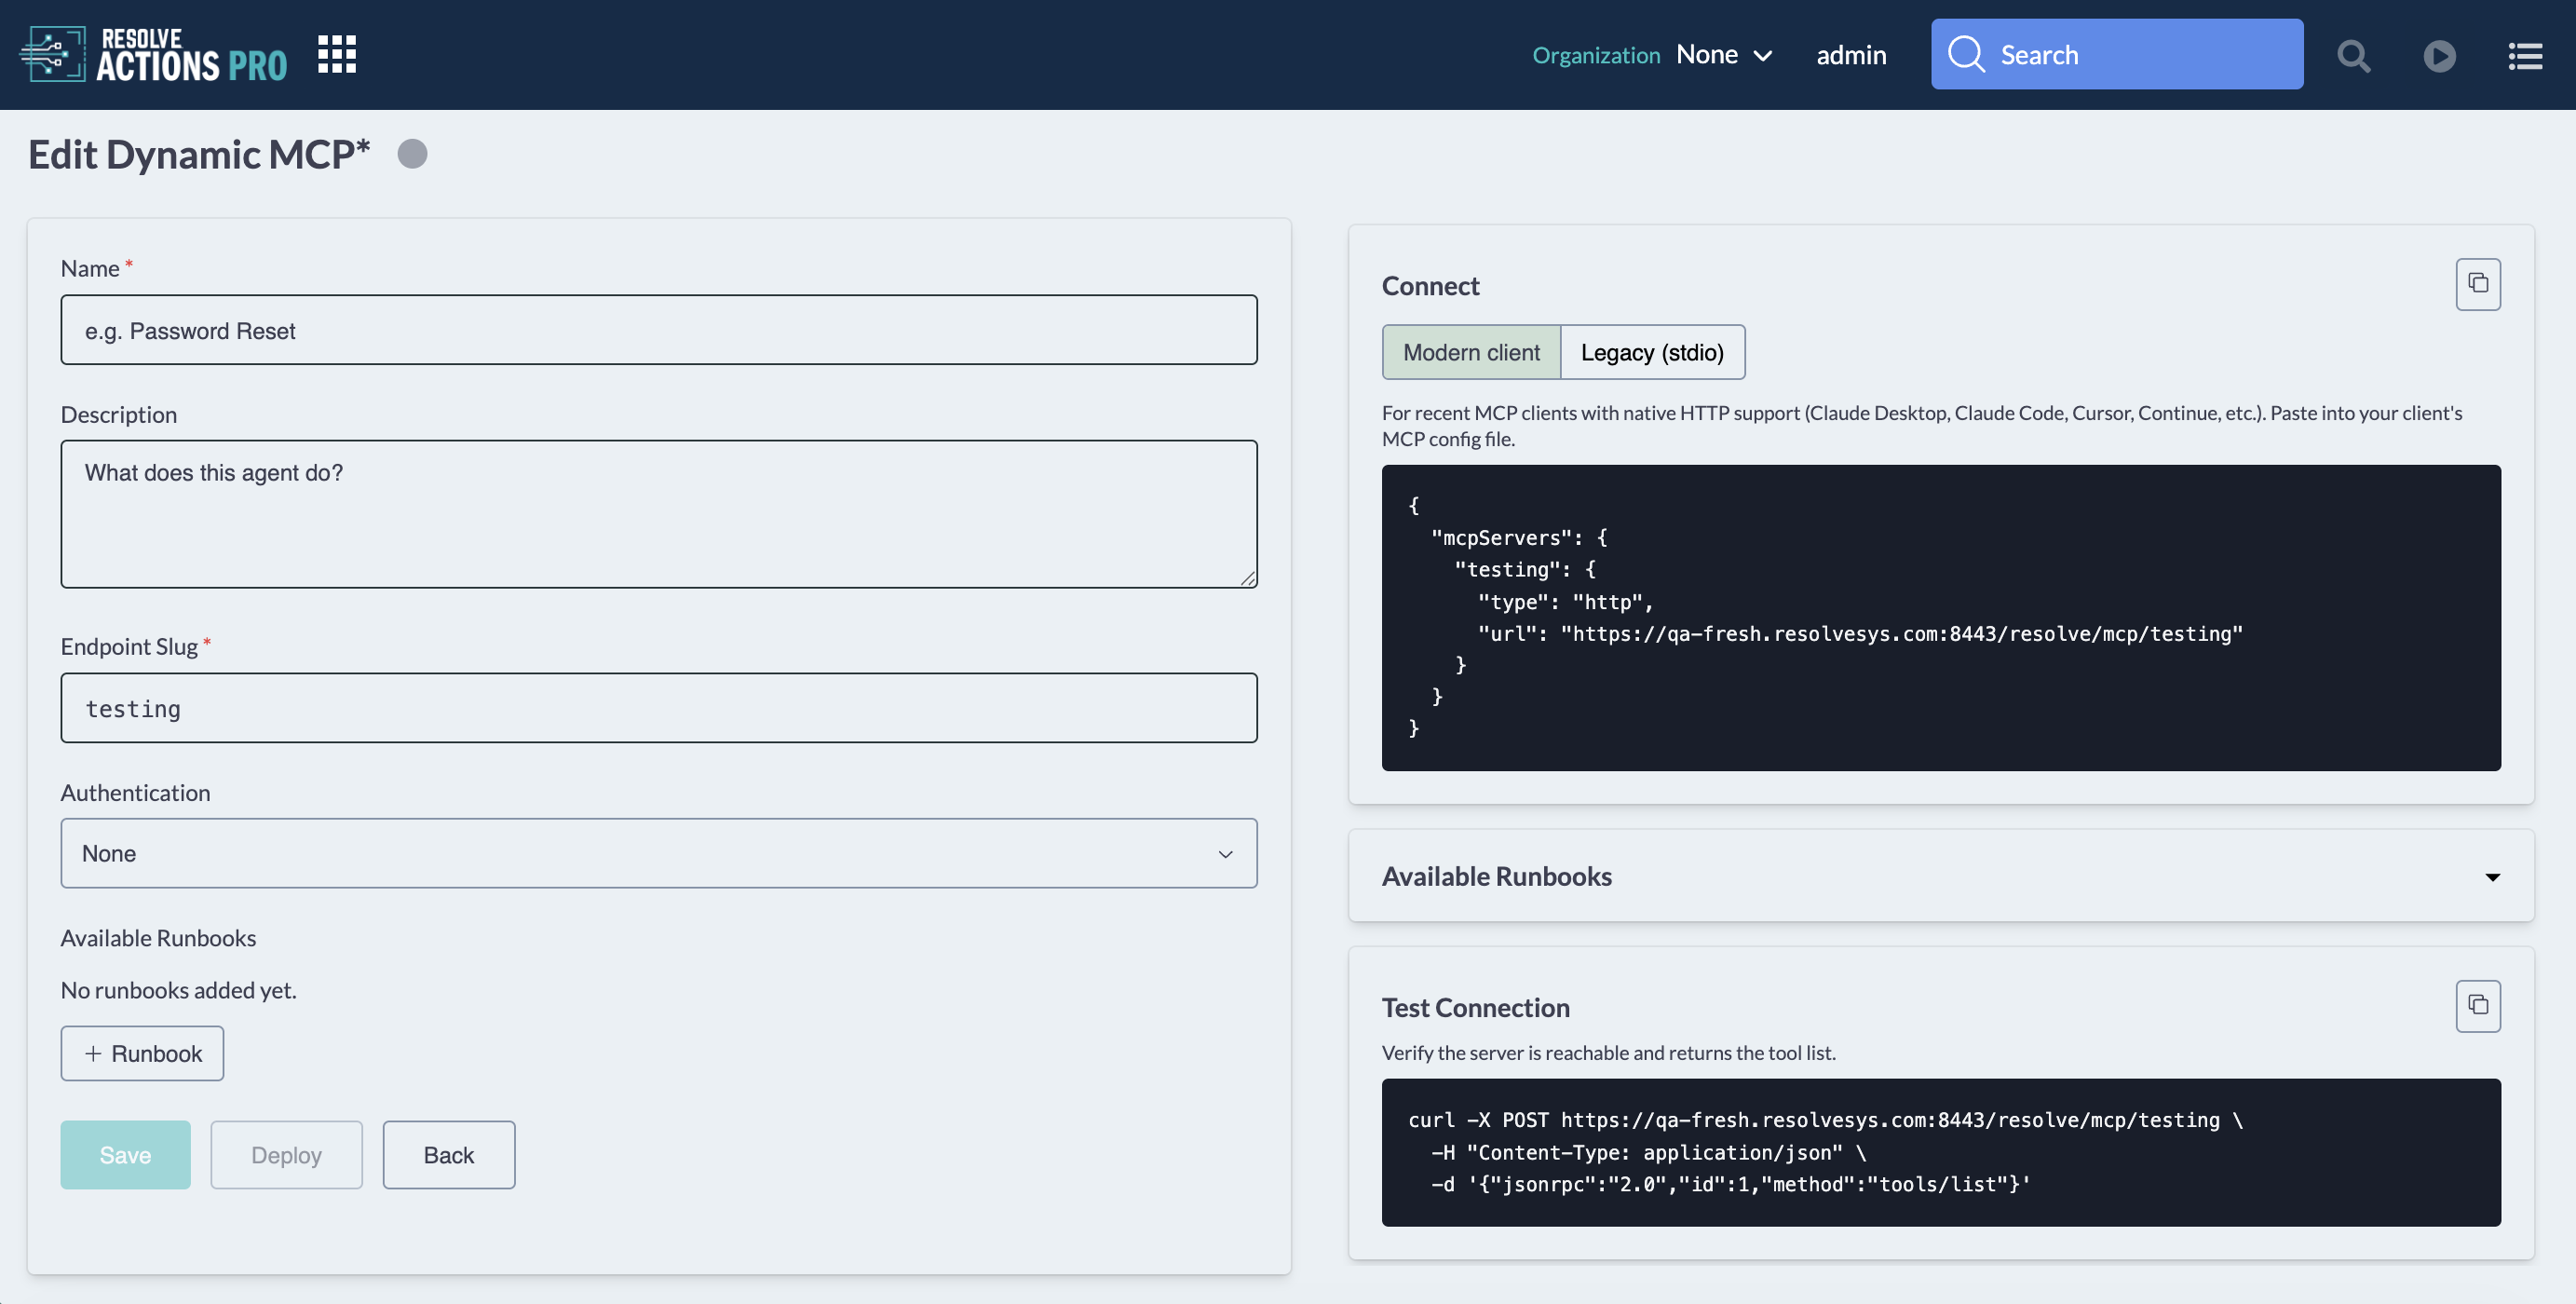
Fill in the following fields:
Field Description Name A human-readable label for this server (e.g., "Password Reset"). Description A short summary of what this agent does. Endpoint Slug Auto-generated from the name you enter. Authentication Select None, OAuth, or API Key. As you fill in the form, the Endpoint panel on the right updates in real time, showing your callable URL and a ready-to-use curl example.
Add Skills by clicking + Runbook and searching for existing Runbooks.
Step 3: Configure Authentication
Under Authentication, select the method that fits your use case:
Type When to Use What's Required None For internal or trusted environments only Nothing — endpoint is open API Key When a single shared credential is enough to authorize callers A generated API key OAuth When callers authenticate via an identity provider using a client-credentials flow Client ID and Client Secret The UI will display the required credential fields based on your selection.
Use None only in controlled environments. Any caller with the endpoint URL will have access.
API Key
API Key details
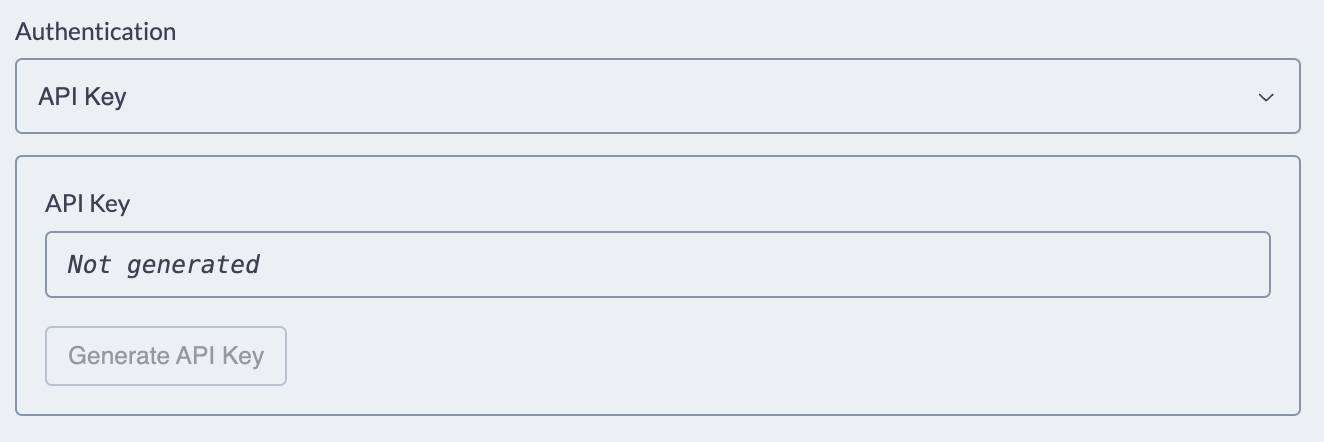
The key is stored encrypted and validated using a constant-time comparison. It's revealed only once, at the moment it's generated, copy it immediately, as it can't be retrieved again later. If it's lost, or if you need to rotate it, you can regenerate a new key at any time from this screen (this immediately invalidates the old one).
OAuth
OAuth details
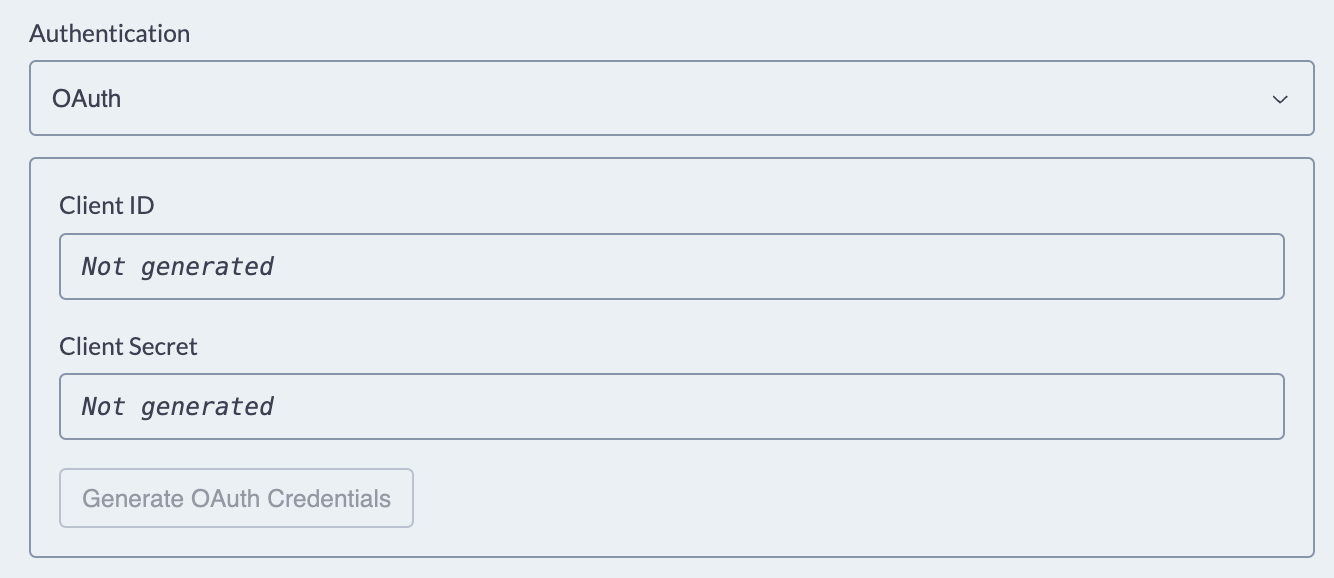
OAuth uses a client-credentials flow. When selected, the server generates a Client ID and Client Secret, and callers authenticate by exchanging these for a Bearer access token. This adds the following endpoints for your server:
| Endpoint | Purpose |
|---|---|
GET /{slug}/.well-known/oauth-protected-resource | Protected resource discovery document |
GET /{slug}/.well-known/oauth-authorization-server | Authorization server discovery document |
POST /{slug}/token | Token endpoint — exchanges client credentials for a Bearer access token |
Like the API Key, Client ID/Secret credentials can be regenerated at any time if you need to rotate them.
Step 4: Select MCP Skills
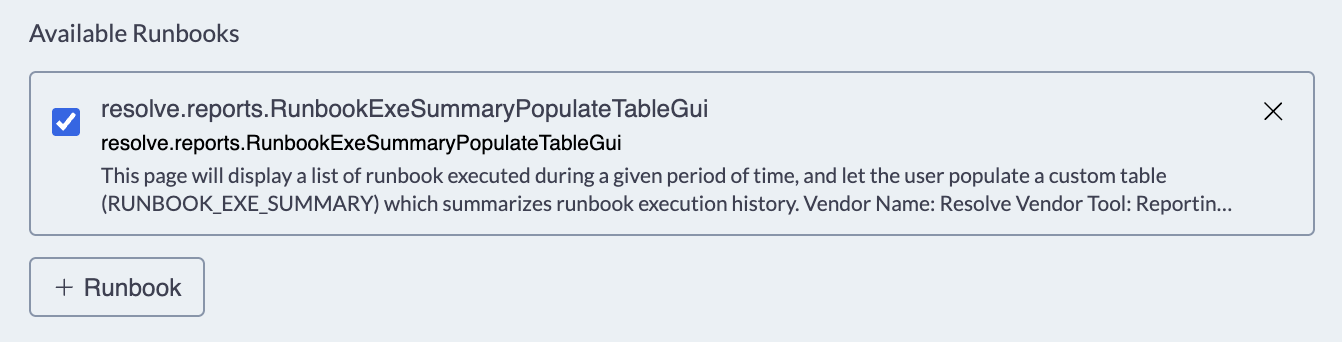
- Under Available Runbooks, click + Runbook.
- Enter at least two letters to search for Runbooks.
- Select desired Runbooks.
- Click Save.
The list of available runbooks will be displayed onscreen.
Editing Skills
- To Deactivate skills, click the blue checkbox so that it is deselected.
- To Remove skills, click the X at the top right corner of the Runbook. When prompted, confirm that you'd like to remove it.
Step 5: Review the Connect Panel
As you configure your server, the right-hand panel updates automatically with everything needed to call the MCP.
Use the copy button to copy the config and use with your MCP clients with native HTTP support.
Available Runbooks and Test Connection
Under the Connect Panel, you will find:
- Available Runbooks: A list of all Runbooks currently active in your MCP.
- Test Connection: Copy the curl command to verify if the server is reachable and return the tool list.
Step 6: Save Your MCP Server
Once you've configured the name, authentication, and skills, click Save to create the server.
Editing Existing Dynamic MCPs
From the Dynamic MCP landing page, click any Name to open the Configuration window.
At the top of the window, a gray or green dot will indicate whether the status is Deployed or Not Deployed.
If changes are made to the settings, an asterisk will appear next to the name to indicate that you need to save.
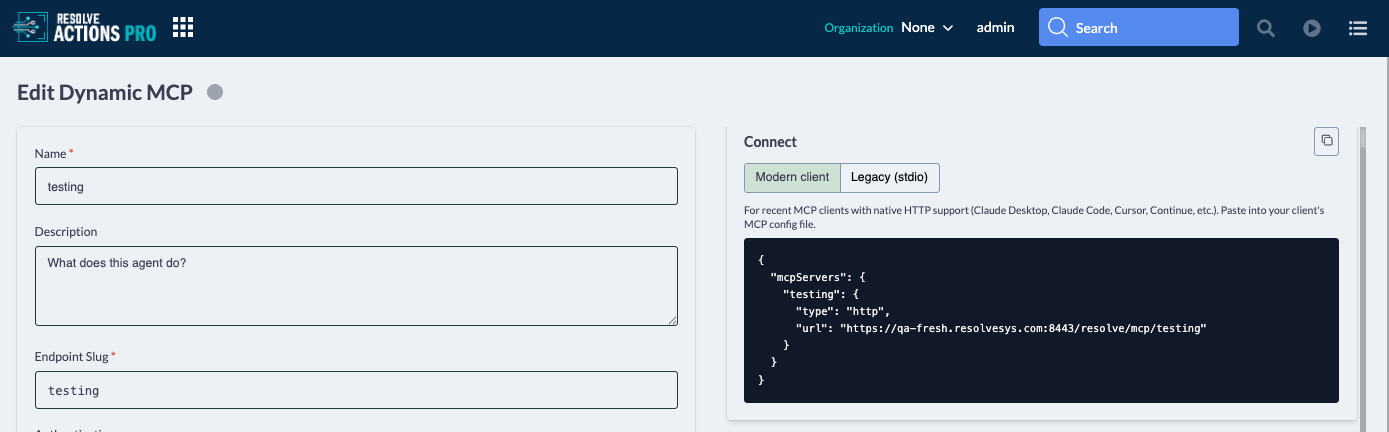
If any modifications are made to a Deployed server, the status will automatically change to Not Deployed.
Managing Existing Dynamic MCPs
From the Dynamic MCPs landing page you can:
- Search for an existing MCP by name using the search bar.
- Filter by status (Deployed or Not Deployed) using the All dropdown.
- Edit an existing MCP by clicking its name to change its description, auth settings, or skill selection.
- Deploy an existing MCP by clicking the word Deploy in the row.
- Delete an MCP by clicking the checkbox next to its name and selecting Delete at the top right.
Deleting a Dynamic MCP immediately deactivates the endpoint. Any agent or system calling it will begin receiving errors. Coordinate with dependent teams before deleting.