Topology
This page is available only on the old Insights User Interface.
If you are working on the new User Interface, you will not be able to see this page. Please use the Legacy Insights button in the top-right corner of the header to return to the old interface and access this page.
Overview
The Topology module represents the discovered entities connected based on Resolve Insights discovery algorithms. The Topology window presents a graphical, topological map view of the devices, the links between them, and the overlays on the devices. Topology is presented as an interactive display that can be moved, dragged or zoomed as required. The topology map is updated automatically as Insights discovers new devices during its periodic scans or as new devices are added manually.
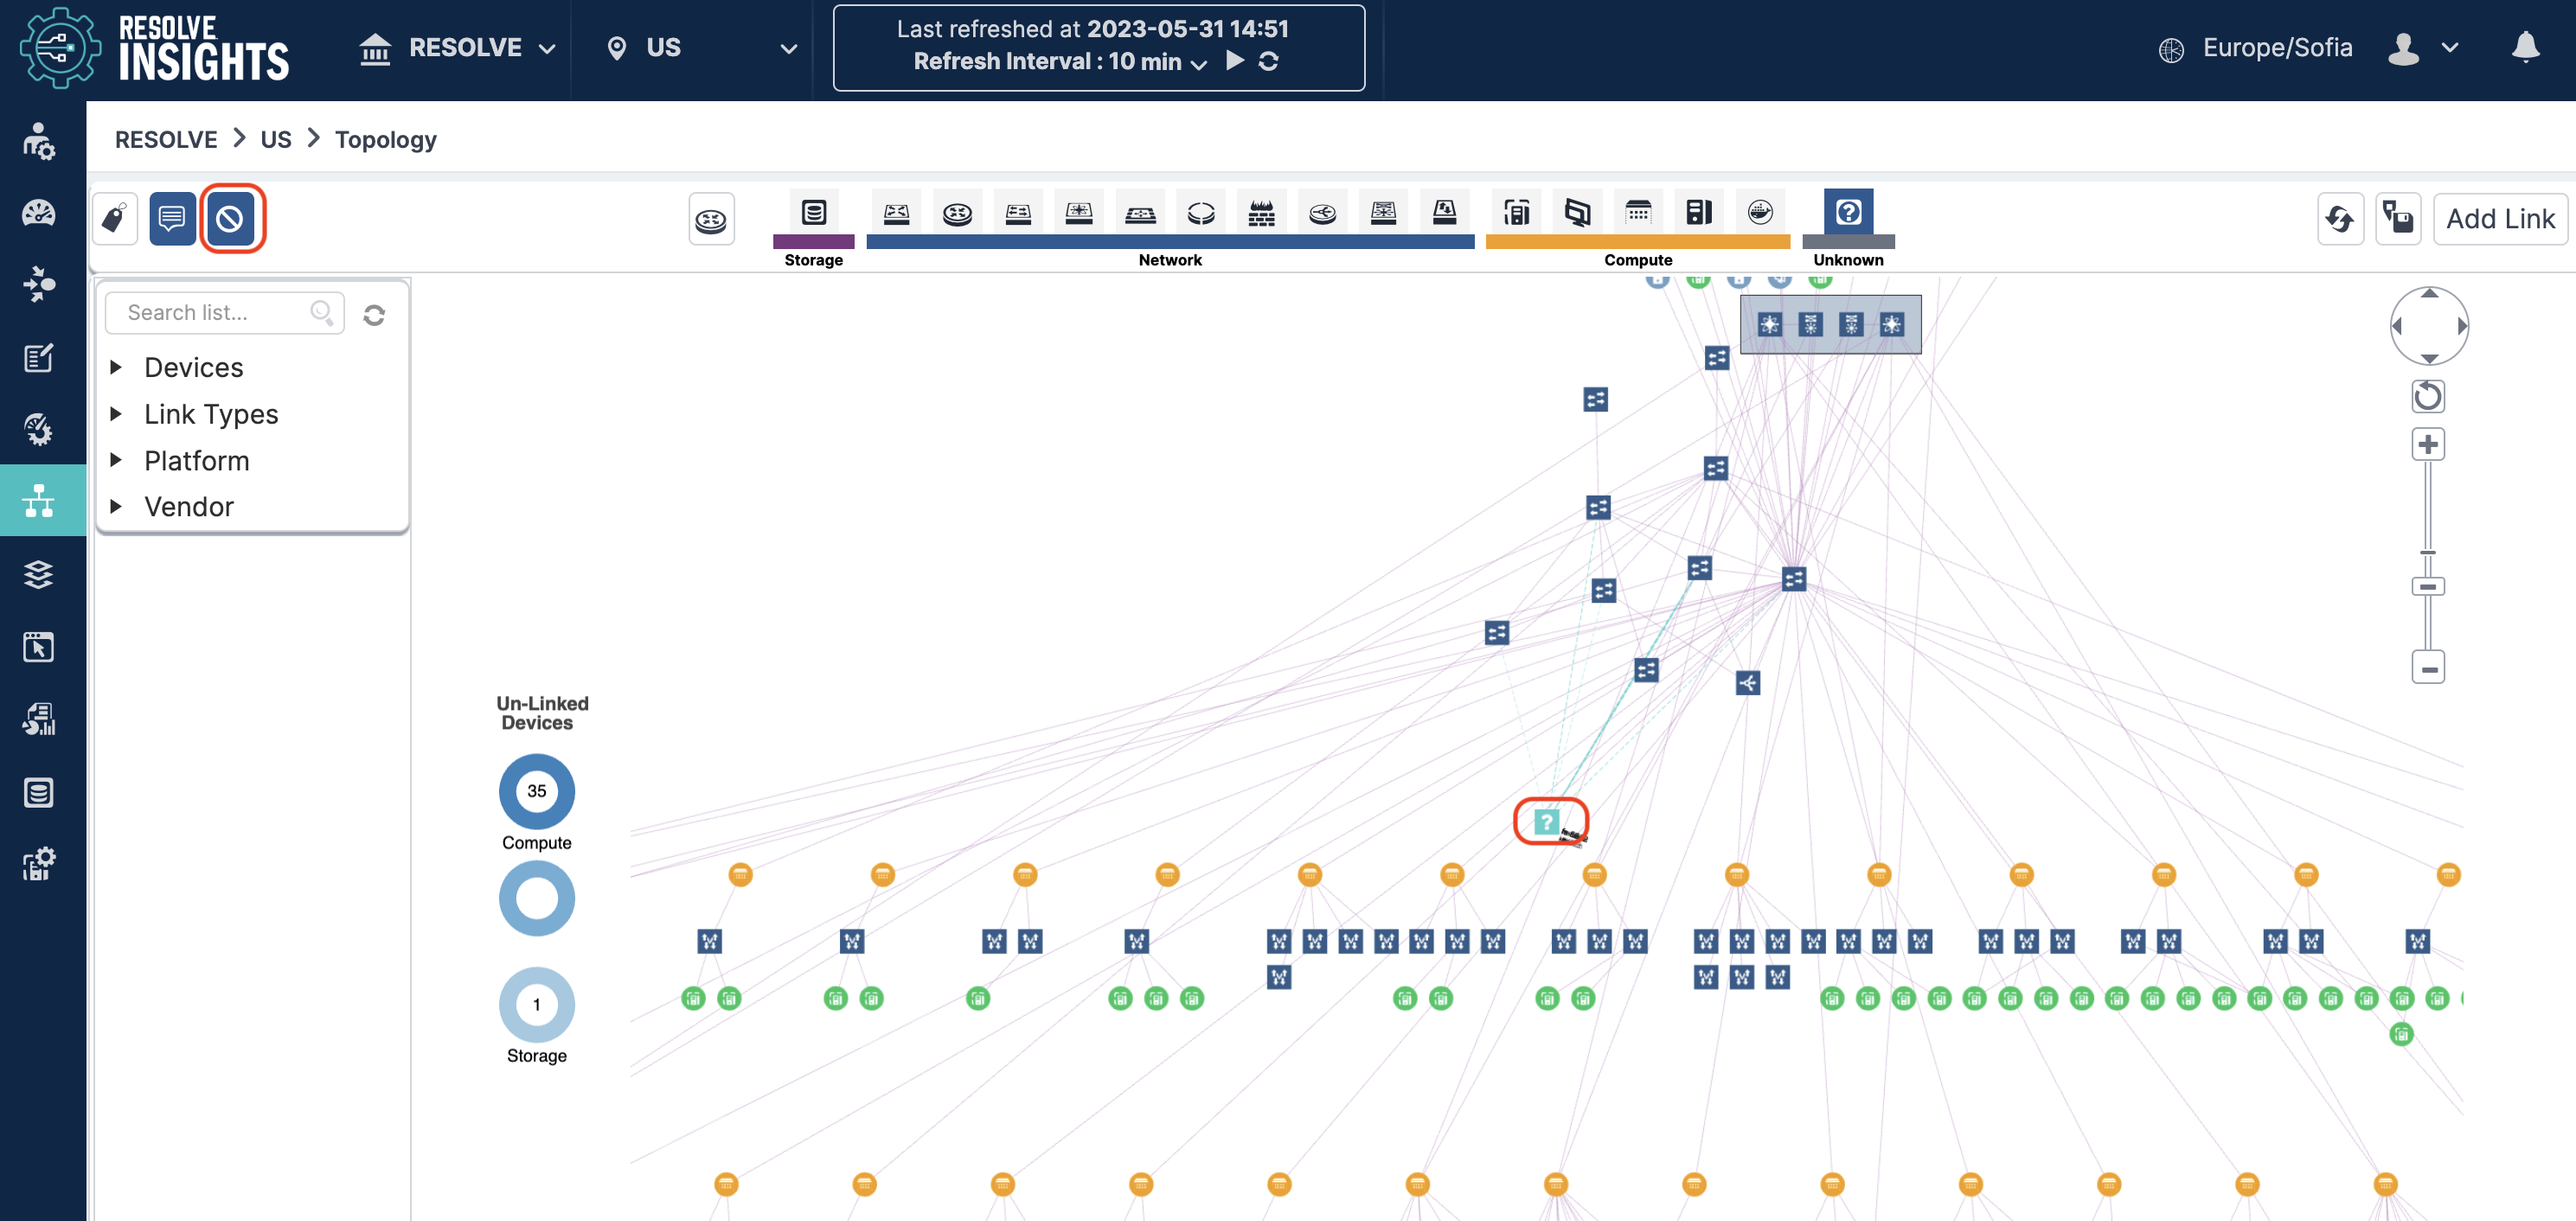
Understanding the Topology Toolbar
The toolbar at the top of the Topology page contains different tools that you can use while working with the content, like showing or hiding data, filtering data, saving the view, and so on.
The following table describes the available tools:
| Icon | Description |
|---|---|
| Shows and hides the labels | |
| Shows and hides the tooltips | |
| Shows and hides the disconnected devices | |
| Silver Peak devices | |
| Storage: Storage | |
| Network: Network | |
| Network: Router | |
| Network: Switch | |
| Network: IOM | |
| Network: VRouter | |
| Network: HSRP VIP | |
| Network: Firewall | |
| Network: Load Balancer | |
| Network: Fabric Interconnect | |
| Network: VSwitch | |
| Compute: VM | |
| Compute: Compute | |
| Compute: Hypervisor | |
| Compute: Bare Metal | |
| Compute: Docker | |
| Unknown: Unknown | |
| Reset filters | |
| Reset View | |
| Save View |
Filtering the Topology Map
On the topology map, icons represent network, compute, or storage devices. You can customize what elements appear on the topology map and configure it to show only the information that you want.
Filtering by Device Type
Use the toolbar at the top to select or unselect the types of devices (Storage, Network, Compute, etc.) that you want to be visible on the topology map.

To hide or show a device type, click the type icon to alternate between the two visibility states. White background means visible while gray means hidden.
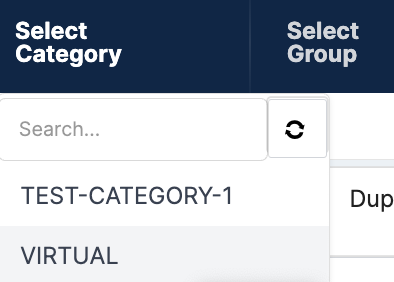
Filtering by Device Group and Category
You can also filter by device Group and Category and visualize only the topology of a specific device group or category. A device group is a number of devices grouped together in accordance with your specific business needs. Device groups can in turn be combined into device group categories for an even more detailed overview of your system.
To filter by device group or category, in the upper Main Menu bar, hover your mouse pointer over Select Group or Select Category and click the one by which you want to filter.

For example, if you select a specific category, the view will only show information about the devices included in the device groups associated with this category, in this case "Virtual".
To return to viewing all devices again, go to another Insights view, such as Inventory, and then return to Topology.
The filters are only visible if there are existing Device Groups and Categories in your Insights instance.
The Device Groups and Categories drop-down lists are independent. Device Groups always lists all existing groups regardless of your selection in Categories.
You can only filter by one category or one group at a time. If a category is selected and you then select a group, the category filter will be cleared and the results will be filtered by the selected group, and vice versa.
Filtering by Application
The topology map allows you to only visualize the topology of a selected application.
To filter by application, in the Topology page's left panel, expand Application and then click the name of the application that you want to view.
To return to viewing all devices again, click the Reset icon in the upper-right corner of the same panel.
Showing Disconnected Devices
Disconnected devices are devices that are not connected to any other component.
To see the list of disconnected devices, click the Show Undiscovered Neighbours icon in the upper left corner of the toolbar.
Filtering by Link Type
The links that connect devices on the map are classified under different types. You can only view the links of a particular type.
To only view the links of a particular type, in the Topology view's left panel, expand Links Types and click the link type that you want.
The selected link type is shown interactively on the map and the remaining items are grayed out.
The visual representation of the links on the map provides quick information about the link:
- A solid line represents any type of discovered link between two elements in the topology map.
- A dotted line represents a link to undiscovered neighbors.
You can get more information about a link by clicking on it on the topology map.
Searching for Devices
If you know the name of a device, or a part of its name, you can search for it in the Topology view's left panel and then pinpoint it on the map.
To find a device on the map:
- In the Search list box, enter the full or partial device name.
The list filters to show only the categories that contain a device with the requested name. - In the list, expand the category where your device is located and click the device name.
The device is highlighted on the map.
Viewing Device Names and Device Details
To more quickly identify a device, you can choose to display the device name right next to the device icons. To enable device names, click the Show Labels icon on the left side of the Topology toolbar.
To quickly find more information about the devices, you can choose to show tooltips when you hover over a device icon. The tooltips show basic information about the device such as hostname, IP address, and Device ID. To do that, click the Show Tooltips icon on the left side of the toolbar (enabled by default).
If you want to view the full device details, click the device icon and the information will appear in a dialog box.
Manually Adding Links to the Topology Map
In case the discovery hasn't identified a link that you know it's there, you can manually add the link to the topology and associate it with a specific interface on a device.
To add a link between two devices, follow these steps:
- On the right side of the toolbar, click Add Link.
The Add Link dialog box appears. - In Device A, enter the device from which you want to create a link.
- In Device B, enter the device to which you want to create a link.
- Under each device, select the interface that is responsible for the link.
- Click Submit.
Managing Devices on the Topology Map
The context menu of each device in the topology provides a few important functions.
Rediscovering a Device
To make sure that the device information shown reflect the latest state of this device, you can restart the discovery for this particular device.
To rediscover a device, right-click its name and select Re-discover.
Hiding a Device
To hide a device from all Insights views, right-click its name on the topology map and select Hide.
You can later unhide a device by going to Inventory > Hidden Devices.
Navigating the Topology Map
Zooming the Topology
You can use the mouse to move the topology on the screen by clicking and dragging the left mouse button in the map area. You can also use the mouse wheel to zoom in/out. Or, if you prefer, you can use the map zoom controls available on the right of the topology map to navigate around it.
Resetting and Refreshing the Map
You can reset the map back to the default view that is displayed when you log in by clicking the Reset View icon in the topology toolbar.
You can also refresh the map so that it displays the latest information by clicking the Refresh icon in the topology toolbar.
Saving the Topology Map
After you have changed the topology map layout to suit your needs, you can save the layout so that you don't have to manually rearrange the topology map every time.
Take these steps to save the topology map view:
- Select the device group that you want to view from the upper navigation bar.
- Make content and layout changes to the topology map as required.
- Click the Save View icon in the topology toolbar.