Working with Workflows
Opening a Workflow
The first step in using the Workflow Designer is to open a workflow. The following sections explain how to open a workflow using the options at the top of the Welcome screen.
If all workflows were closed when you last quit the Designer, the Welcome screen appears by default when you log in. To open the Welcome screen when one or more workflows are already open, click the plus icon (on the right side of the workflow tabs).
You can open a workflow from the Welcome screen using the following options:
- Create New: Creates a blank workflow to which you manually add activities. For more information, refer to Creating a New Workflow.
- Open Workflow: Opens a previously saved workflow, so you can continue building or editing it. For more information, refer to Opening an Existing Workflow.
- Templates: Opens a list of pre-built workflows that can be used as a starting point for building a workflow specific to your requirements. For more information, refer to Opening a Template.
Creating a New Workflow
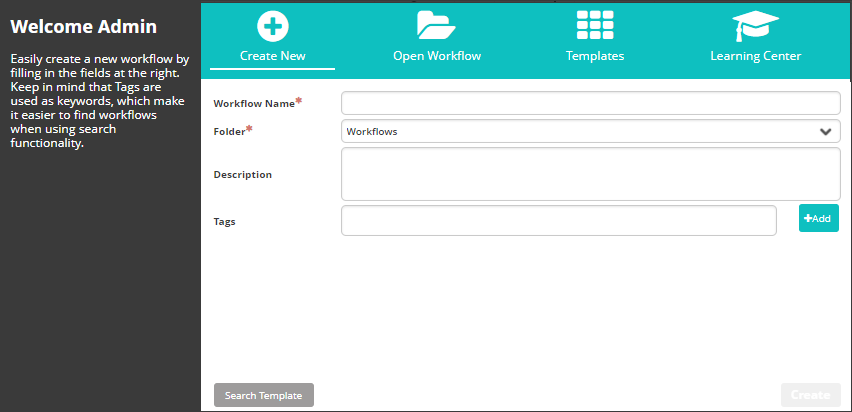
The Create New option adds a blank workflow to the Workflow Designer. A blank workflow is represented on the Designer canvas by a Start element and an End element.
Create your workflow by giving the workflow a name and a description. Although a description is optional, as a best practice it is recommended to always enter some text that provides a brief, high level summary of the automation process(es) involved. This allows other users to quickly understand the purpose of the workflow.
It is also recommended that one or more tags be assigned to a new workflow. Tags are keywords that help to organize and easily search for your workflows.
To create a new workflow:
At the top of the Welcome screen, click Create New.
In the Workflow Name field, enter a logical, descriptive name for your new workflow.
The name of the workflow must be unique. If you enter a name that is already in use, the system will automatically save the workflow as<name> (1).In Folder, select a folder path for your workflow.
The default path is Workflows. To see other possibilities, pull down the list to see the other existing folders.noteYou can create new folders. In the Repository section, see Workflows
In the Description field, enter a short summary of the workflow, or notes about relevant use cases.
Optionally, in Tags, select tags to be associated with the workflow.
You can filter the list by entering part of the tag name.In addition, you can create new tags as necessary. For more information, refer to Adding Tags to a Workflow.
Click Create.
The new workflow is displayed on the Designer canvas.
Adding Tags to a Workflow
Tags are keywords that are applied to a workflow. They are useful for organizing your collection of workflows and for helping users to quickly find a workflow.
Generally, tags are actions or categories that are relevant to a workflow. For example, appropriate tags for the workflow Monitor Windows Event Log would be Monitoring, Windows, Logs, and so on.
For convenience, the Workflow Designer offers a large selection of preconfigured tags. However, if you need tags that are not provided, you can easily create new tags and add them to the Tags list.
To add new tags to a new workflow:
- In the Create New screen, click Add next to Tags.
The Add Tag popup opens. - Enter a name for the new tag in the upper field and then click Add.
The new tag appears in the lower field. Repeat to add as many tags as required. - Click Save.
The new tags are saved in the system and added to the Tags list.note- At any point, you can remove a new tag by clicking the X icon on the tag. You can remove all using the Clear all button.
- You will have the opportunity to add or remove tags when you save your workflow. See Using the Save As Option
Opening an Existing Workflow
Locating Existing Workflows
Opening a workflow involves displaying a previously saved workflow in the Designer so you can continue to build or edit it. You can open a saved workflow using any of the following methods:
- Re-open a recently opened workflow: Involves selecting a workflow from a list on the Welcome screen. For details, refer to Re-opening a Recently Opened Workflow
- Open a workflow from the Repository: Involves selecting a workflow from the collection of all previously saved workflows. For more information, refer to Opening a Workflow from the Repository.
- Import a workflow into the Workflow Designer: Involves selecting a previously exported workflow that is saved as an XML file. For more information, refer to Importing a Workflow.
Re-opening a Recently Opened Workflow
The Workflow Designer automatically tracks the workflows that you have been working on. When you click the Open Workflow tab of the Welcome window, information about the workflows that you have opened most recently is displayed. Up to 10 workflows can be listed.
To re-open a recently opened workflow, from the Open Workflow tab of the Welcome screen, select the row of the required workflow, double-click it or just click Open.
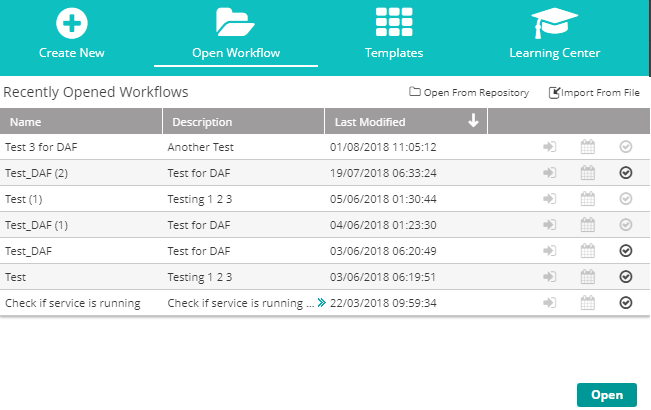
The Welcome screen closes, and the selected workflow is displayed in the Workflow Designer.
Opening a Workflow from the Repository
The Repository lists all previously saved workflows, regardless of who last saved them or when they were last opened. Use the following procedure to access a workflow from the Repository.
To open a workflow from the Repository:
- At the top of the Open Workflow tab of the Welcome screen, click Open From Repository.
The Workflows frame of the Repository opens.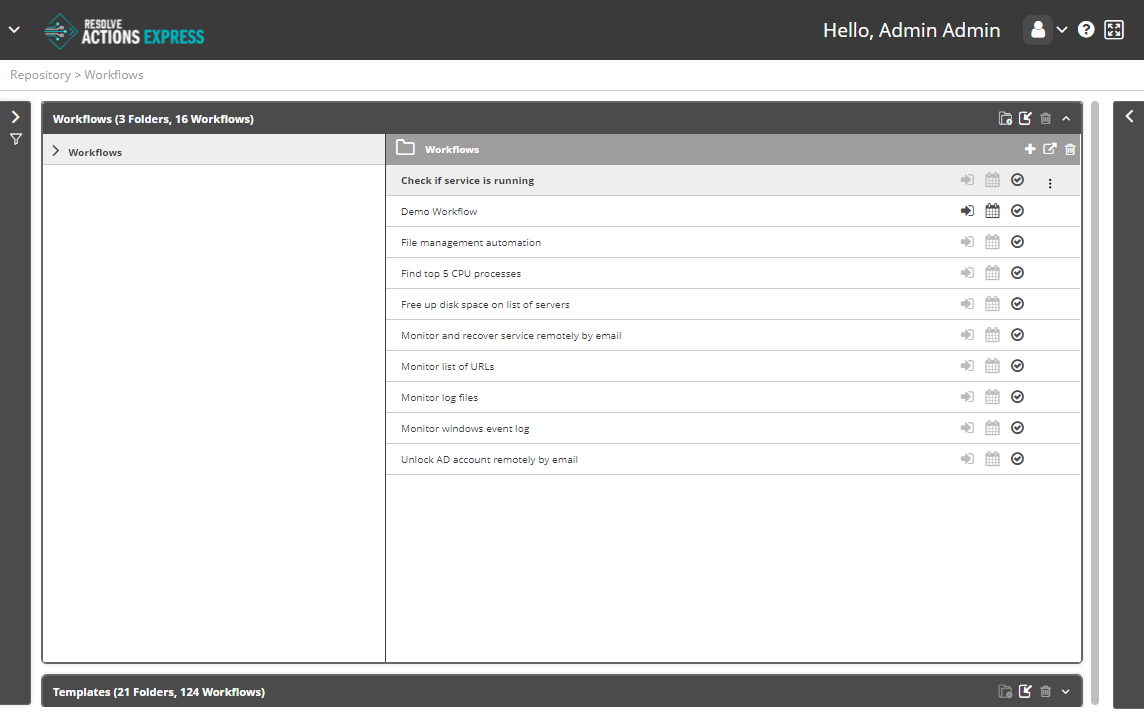
- In the left pane, choose a folder to open.
- In the right pane, click a workflow to select it.
Expand the collapsed panel on the right to see the workflow's details and settings.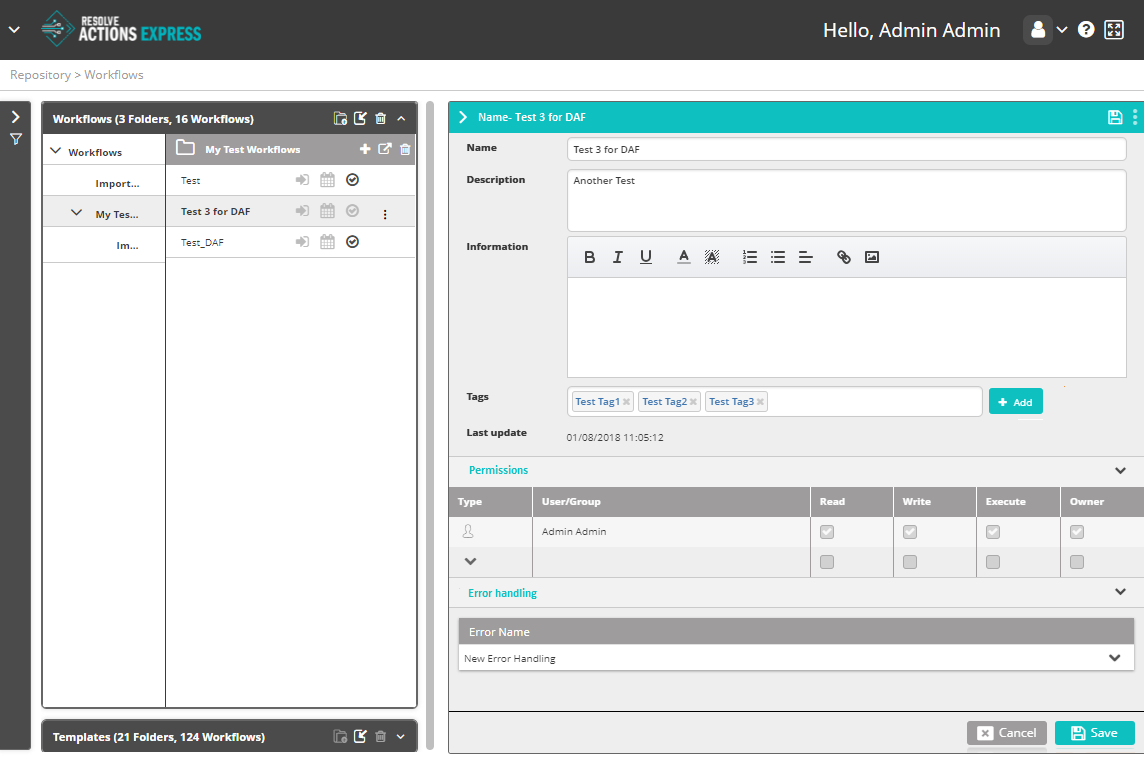
- In the upper right corner of the screen, click the tree-dot actions menu and select Open.
The selected workflow is displayed in the Workflow Designer.
Importing a Workflow
Workflows can be exported to XML files, so you can back up or share your work. Importing a workflow involves opening a previously exported workflow in the Workflow Designer.
Workflows are packaged in a ZIP archive when exported. When importing workflows, you can import either the ZIP file or the XML file found in it.
Unpacking the ZIP file can be useful when it contains multiple exported workflows, but you only want to import one.
Export Format
The export can contain one or more workflows, stored as XML files named <Workflow name>.xml. In addition, each export contains a file named workflows_export_summary.xml. You can disregard this file when importing individual XML files.
To import a workflow:
- Verify that the workflow you want to open has been exported and in XML file format.
- At the top of the Open Workflow tab of the Welcome screen, click Import from file.
The standard operating system file opening dialog is displayed. - Choose the required XML file, and then click Open.
The selected workflow is displayed in the Workflow Designer.
Inserting Existing Workflows
Resolve Actions Express scans the content of any workflows that you are importing to see if they don't already exist in the system. When the workflow that you are importing already exists, you have the option to:
- Use existing workflow item - Skips the import of this workflow and keeps the copy that is already in the system.
- Keep both workflow items - Import the workflow under a new name (ending in
_Imported) to avoid any risk of overwriting content. - Overwrite workflow items - Imports the workflow, completely overwriting the content of the matching workflow found in the system.
Opening a Template
Templates are pre-built, customizable workflows that provide a foundation for building workflows for specific scenarios. The Workflow Designer offers a wide selection of templates, including suggested automation workflows for file management activities, service restarts, event log monitoring, and many other common processes. You may use a template as a starting point for designing your own version of a workflow, or you can include one or more templates as part of a larger workflow.
This section explains how to open a template from the Welcome screen of the Workflow Designer.
To open a template:
At the top of the Welcome screen, select the Templates tab. Alternatively, at the bottom of the Create New tab, click Search Templates.
The Templates tab opens, listing all defined templates.
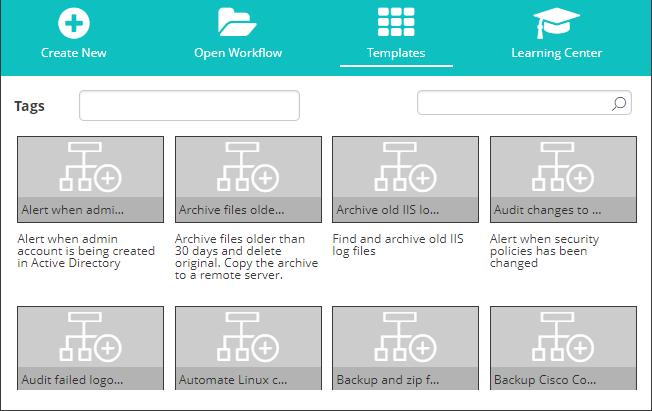
If desired, filter the Templates list using one or both of the following techniques:
- Filter by tag: Click in the Tags field and select tags that are relevant to the template you are looking for. For more information about tags, refer to Adding Tags.
- Filter by search term: In the Search field, enter a term related to the template you are looking for, and then press Enter.
The following example shows a Templates list that is filtered according to both the Active Directory tag and the search term user:
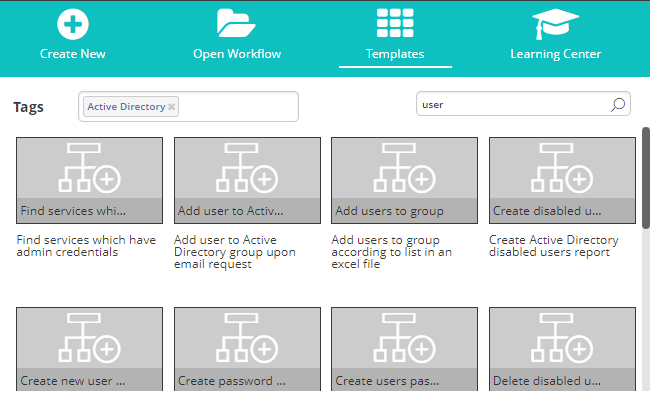
From the Templates list, select the desired template.
The selected template is displayed in the Workflow Designer.